Steck - Installation Procedure
Install Fans
-

Step 1
Remove fan mounting bracket by removing screws (4)
-

Step 2
Install fans on to the fan bracket and align the fans before tightening
-
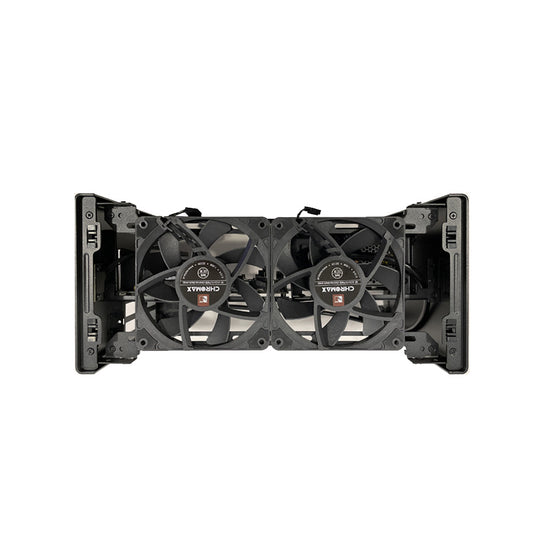
Step 3
Install fan bracket (with fans) back on to the Steck
Install / Remove Feet & Bottom Panel
-

Step 1
Remove feet bottom screws (4)
-
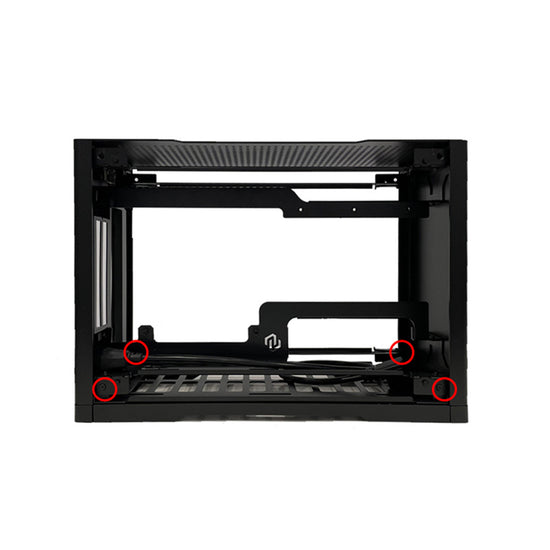
Step 2
Remove feet side screws (4)
-
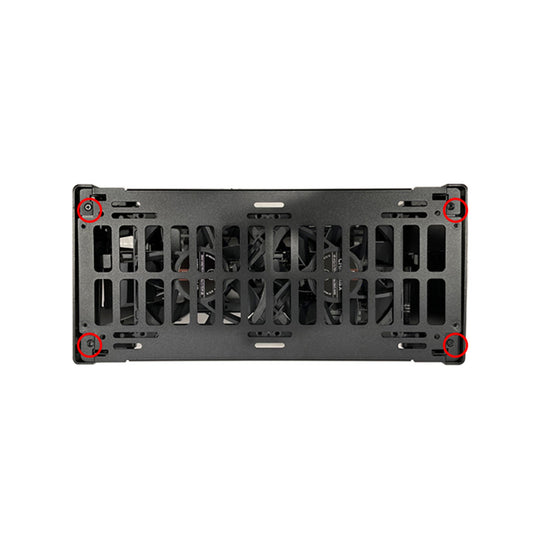
Step 3
Remove bottom panel screws (4)
Install Thick Graphics Card
-
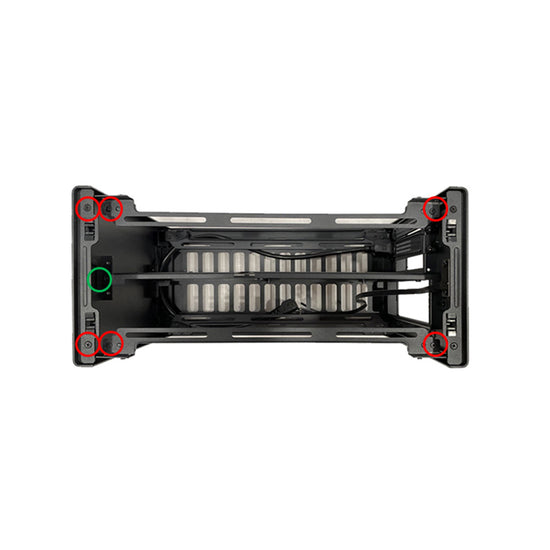
Step 1
- Remove clip bracket and fan bracket (red)
- Remove top center spine (front) screws (1 green)
-
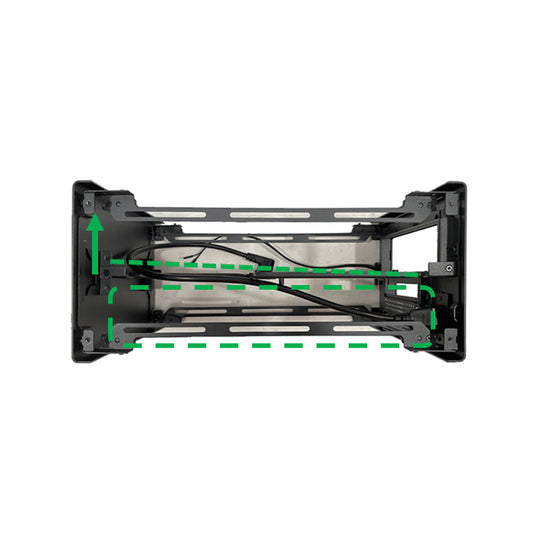
Step 2
- Push center spine to create more space for GPU side
- Slide in the graphics card from the top
-
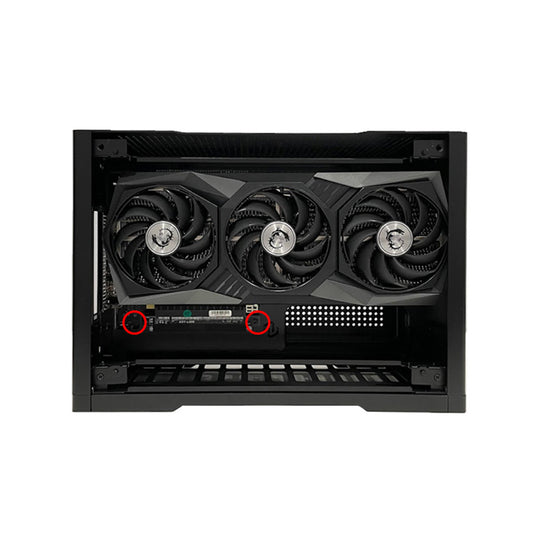
Step 3
- Install graphics card on to the PCIe riser adatper
- Install the adatper screws (2 red)
Install / Remove Top Hat
-
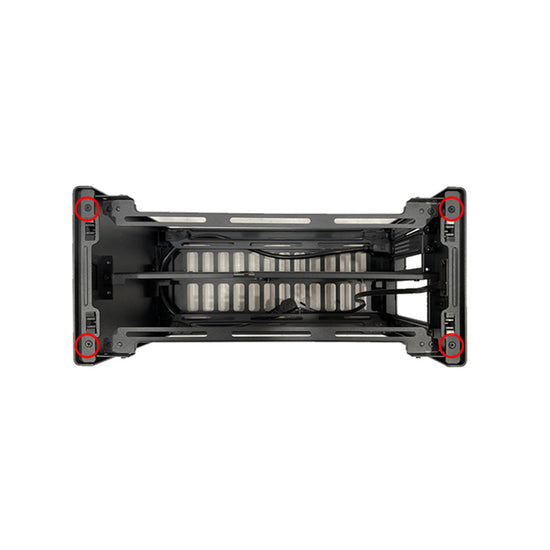
Step 1
- (Top) Remove top clip brackets (2) by removing the screws (4)
- (Bottom) Remove feet & bottom panel
-
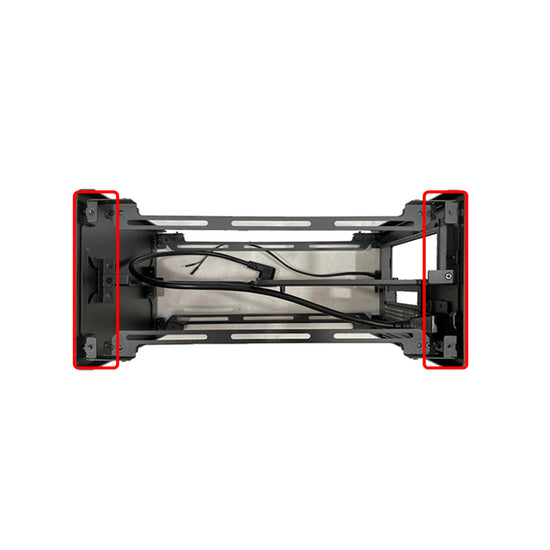
Step 2
Slide in two ends of the top hat from the top/bottom
-
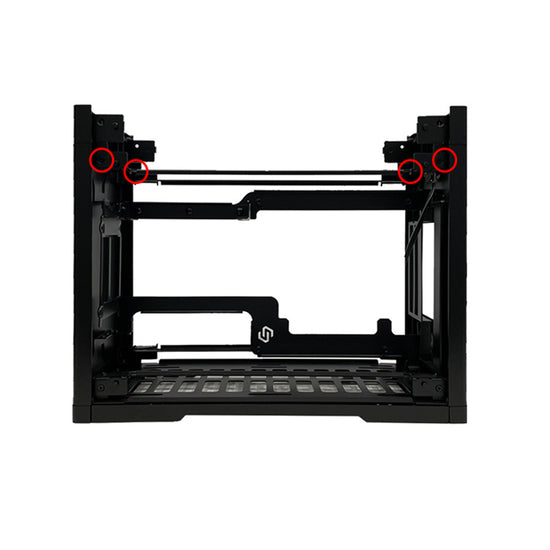
Step 3
- Tighten the top hat parts with side screws (4).
- (Top) Reinstall top clip brackets (2) on to the top hat.
- (Bottom) Reinstall bottom panel & feet
Change Back Panel Bracket
-

Step 1
- Remove feet / bottom panel / top clip brackets / power button module
- Remove center spine rear screws (4 red)
- Remove fan bracket screws (4 green)
-
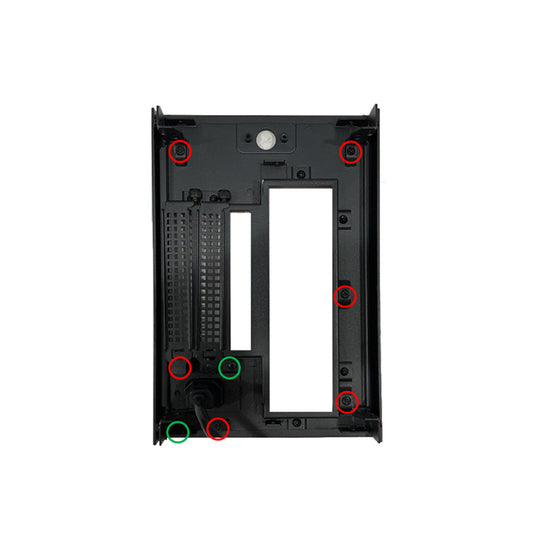
Step 2
- Detach rear panel
- Remove rear bracket screws (6 red)
- Remove power adapter bracket screws (2 green)
-

Step 3
- Change rear bracket
- Reinstall parts from Step 1 & 2
- Adjust center spine aligment


